If you want to weave something for your home but have never touched a loom, you have two genuinely beginner-friendly options: a woven keychain or a small wall hanging. The keychain is the faster, smaller commitment—a one-inch by four-inch strip finished with a metal clip. The wall hanging takes more time and yarn but gives you a decorative piece to display. This guide compares both, walks you through each one's supplies, and explains the finishing steps that turn loose weaving into a finished object.
Introduction to Beginner Weaving
Weaving sounds intimidating, but at its core it's just interlacing threads: the warp is the set of vertical threads held taut on a loom, and the weft is the yarn you pass horizontally over and under them. Everything in this guide happens on a simple frame loom—a wooden frame with pegs or notches along the top and bottom that hold your warp threads in place.
Frame looms are one of the best starting points for a complete novice because they are inexpensive and very simple to use, as weaving artist Petra Marciniak puts it—and she's quick to add that experienced makers produce stunning work on these same humble tools. You don't need to build anything or learn complex techniques to start. The two projects here stick to the fundamentals: setting up a loom, basic over-and-under weaving, and removing your finished piece safely.
Project 1: Weaving a Simple Keychain
The keychain is probably the simplest and fastest woven gift you can make, according to Nicole Bunting of Warped Fibers, who designed this project. It's woven at 6 EPI—that's six warp ends per inch, a sett loose enough that the weaving goes quickly—to a finished size of about one inch by four inches.
The supply list is short. You'll need a small loom, yarn for both warp and weft, a keychain D-clip, and a tapestry needle for tucking in ends. Because the piece is so narrow, you can weave it in a single sitting, which makes it ideal if you want to find out whether weaving is for you before investing in larger amounts of yarn.
The weaving itself follows the standard rhythm: pass your weft over and under the warp threads, leaving a small loop at each turn of the row, then gently pull the weft through. When you reach roughly four inches of woven length, you're ready to take it off the loom and finish it, which is where the D-clip comes in.
Project 2: Crafting a Small Wall Hanging
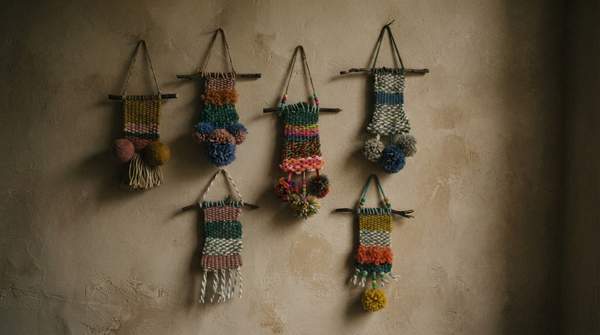
A small wall hanging is the classic first weaving project for home decor. Jane and Sonja of Sustain My Craft Habit designed their tutorial explicitly for people who have never woven before, and it walks you through four skills: setting up a loom, basic weaving techniques, removing the weaving from the loom, and preparing it for hanging.
Your supplies are a loom, warp thread, weft yarn in whatever colors suit your space, and a dowel rod for display. The weaving process is the same over-and-under motion as the keychain, just across a wider area—so you'll spend more time at the loom but have room to play with color changes and texture as you go.
Once your weaving fills the loom, you'll secure everything before it comes off the frame. This is the step that separates a keepsake from a pile of yarn, and it's covered in detail in the next section.
Finishing Techniques for Your Woven Creations
Securing a Keychain to Its Hardware
When you take the woven keychain off the loom, finish one side the way you normally would—this becomes the bottom of the keychain. Then take a keychain clip and put the top warp threads through the D-shaped ring, following Bunting's method.
Next, weave those warp ends back into your weaving and around the D-ring, much like weaving in weft ends. Weave them in far enough that they won't slip out with use—about two inches is what Bunting recommends, admitting she only wove in about an inch on her own sample but that more is better. The friction of the yarn against itself keeps everything secure. Finally, pull the tails taut while you cut off the remaining warp yarn; the tension lets the cut ends retreat back and hide inside the warp tunnels.
Attaching a Wall Hanging to a Dowel
For the wall hanging, Rachel Denbow of A Beautiful Mess finishes by tying a knot in each warp strand to secure the weaving from falling apart. Once all the warp strands are knotted, gently pull the piece off the bottom pegs and tuck the top strands behind the weaving.
Then, using more warp yarn, tie a knot in one end and stitch through each knotted strand, passing up and over your dowel rod, copper pipe, or piece of driftwood—Denbow notes dowel rods are the cheapest option. After the hanging is stitched to the rod, tie a simple loop knot at the top to create a hanger, and it's ready for the wall.
Choosing Your First Weaving Project
Here's the two projects side by side so you can match the effort to your time and goals:
| Category | Woven Keychain | Small Wall Hanging |
|---|---|---|
| Project Type | A small, quick project—one of the simplest and fastest woven items to make, and easy to give as a gift. | A simple decorative piece for your walls, suitable for learning the full basic weaving process. |
| Required Supplies | Small loom, warp and weft yarn, keychain D-clip, tapestry needle. | Frame loom, warp thread, weft yarn, and a dowel rod (or copper pipe or driftwood) for hanging. |
| Key Techniques | Basic weaving at 6 EPI to a 1-inch by 4-inch size; a narrow piece that works up quickly. | Setting up the loom, basic weaving across a wider area, and removing the weaving from the loom. |
| Finishing Method | Thread the top warp through the D-ring and weave the ends back in about 2 inches so friction holds them secure. | Knot every warp strand, stitch the knotted strands up and over the dowel, and tie a loop knot as a hanger. |
The comparison comes down to time and outcome. The keychain demands less yarn, less loom time, and only one finishing maneuver, but it's a small accessory rather than a home accent. The wall hanging takes longer and adds the knotting-and-stitching finish, but it delivers the decorative payoff most people picture when they think of weaving for the home.
Ready to Weave: Your First Project Decision
Choose either a woven keychain for a quick, portable project or a small wall hanging for a decorative home accent, based on your time commitment and desired outcome. If you want a same-day finish and a low-stakes introduction, start with the keychain at 6 EPI. If you want something to hang on your wall and don't mind a longer session, set up a frame loom for the wall hanging.
Either way, you'll know you've succeeded when you're holding a finished woven item—a keychain with its warp ends securely woven around the D-clip, or a wall hanging stitched snugly to its dowel with a loop knot for hanging. That completed piece, with nothing left to unravel, is your proof that you can weave.